Search our Knowledge Base
Search

Create Custom Views


Custom Views are an enterprise package feature that allows you to aggregate data from multiple campaigns and trend the results in an Insight Graph. Additionally, for location-based campaigns custom views can be used to create a Geo Insights Map.

This tool makes it easy to build and manage smaller campaigns for specific keyword groups and then combine data in graphs for reporting. For example, instead of building a campaign with 1000 keywords and 5 tag groups each with a number of individual tags used for filtering multiple copies of the same report, you could build 5 campaigns with tag targeted keywords each based on one of the tag groups. Then create a custom view containing data from all 5 campaigns and trend the combined data in the Insight Graph.
  • Available Insight Graph metrics: Rank Position Stats, and Visibility Score.
  • Available Geo Insights Map metrics: Average Rank, Rank, Rank Distribution, Visibility & SERP Features


custom views
 

Video: How to Create Custom Views


How to Create Custom View Groups


Custom View Groups can be used to organize your individual Custom Views into categories (e.g., client, country, region, product lines, etc.) for easy selection and viewing in reports, graphs and the Custom Views screens.
Custom View Groups


Add a Custom View Group

To add a new Custom View Group:
  • navigate to Reports&Tools > Custom Suite > Custom Views and click Manager in the left menu
  • click the Add Group button
  • enter a Group Name
  • click the Add button

Add Custom View Group

How to Create Custom Views


Reports&Tools > Custom Suite > Custom Views > Manager
  • Click the Add Custom View button to create a new view

Custom Views Manager

Custom View Details
  • Add a Custom View Name to identify your data group
  • Click the Add Data Group button 

Add Custom View Details
Add Data Group
  • Select a Campaign
  • Select the Keyword(s) you want included in the Data Group, options include:
    • All Keywords
    • Individual Keywords
    • Keywords associated with a Tag
  • Select the Search Engine(s) you want included in the Data Group
            
Add Data Group


Multiple Data Groups
  • Continue adding Data Groups and then click the Save button
Save Data Groups


After creating a data group, you can edit it by clicking the pencil icon or delete it by clicking the X icon.


Location (optional)
Custom Views rank distribution data on US Map
Example of Custom Views used to display rank distribution for campaigns that are rank tracking for specific city locations.

If you plan to use a Custom View for display in our Enterprise Geo Insights Map, then enter a location in one of the following formats:
  
US City, State
US City Location

Canada City, Province
Canadian City Location

International City, Country
This format can be used for countries that don't have multiple cities with the same name. In cases of more than one city with the same name (e.g., USA), it's necessary to add the state or province.
European City Location

Country
In a case where you want to display aggregate data per country for multiple countries, you may enter the country name and the map pin will display on the country.
Country Location

Custom Views Average Rank on Europe map
Example of Custom Views set to country location displayed on a map of Europe.


Street Address
In a case where you have multiple locations in the same city or region you may choose to enter a full street address with postal code. This will enable you to zoom in and lock on a region and display all the locations in that area.
Street address Location

Average Rank on Florida map with street locations
Example of an average rank map using Custom Views with street address locations.


Custom View Group (optional)
If you want to associate a Custom View with a Custom View Group, select the group name from the menu and click the Save button. 

select a custom view group


When finished creating (or editing) a Custom View, click the Save button.

How to Bulk Import Custom Views


Prepare and Import Custom Views
Navigate to Reports&Tools > Custom Suite> Custom Views > Manager 

import custom views

Prepare the Import File
Scroll to the bottom of the screen and click the Example File link, download and save the file to your computer.

custom views import example file


Use these tools to obtain the data you need to create the import file:
Open the example file and complete the fields (removing the sample data):
  • custom_view_name (required): this displays in the Custom Views screens as well as in selection menus in reports and graphs
  • location (optional): valid formats are
    • US City, State
    • Canada City, Province
    • International City, Country
    • Country
    • Full street address of the building (do not enter building name, suite, floor or box numbers)
  • campaign_id (required): Campaign IDs can be found by using the Campaign Info tools listed above.
  • se_id (required): Search Engine IDs can be obtained by using the Campaign Info tools listed above, or Search Engine List API or by downloading the Search Engine List Excel sheet. If you want the custom view to be set for all search engines, then enter all_ses.
  • tags (optional):  if the campaign has keyword tags, then you may enter one or more tags in this column. Multiple tags should be separated by a comma (e.g., tag1,tag2,tag3). A list of existing tags per keyword can be obtained using the Export Keywords List function.
  • keywords: required if tags are not used. Keywords should be separated by a comma (e.g., keyword1,keyword2,keyword3). If you want all of the campaign's keywords, then enter all_keywords in this cell. A list of existing keywords can be obtaining using the Export Keywords List function.
  • custom_views_group (optional): if you will have multiple custom views that are related (e.g., same domain, company, topic, location, etc.) you can create a Custom View Group by entering it in this field.
Save as a CSV file.

Import the File
  • Return to the Custom Views Manager screen and click the Import Custom Views Upload button. 
  • Click the Choose File button, navigate to the file location on your computer and load it (button name depends on your operating system).

bulk import choose file

If your file contains updates to existing custom views, then check the box beside "Overwrite Existing Custom Views"
             
overwrite existing custom views

Click the Import button.

Successful Import

successful import


How to Edit, Duplicate or Delete Individual Custom Views


  • To duplicate an existing custom view, click the Copy icon, enter a new name and Save.
  • To Edit, click the pencil icon, make the changes you want and click the Save button.
  • To Delete an individual custom view, click the trash icon. Please note that deletion is permanent.

Add, Edit, Copy or Delete Custom Views


How to Export Custom View Settings


You can export the settings of your custom views for editing and importing in bulk, or to store a copy locally. The export file contains the settings that are in the import file (i.e., custom view name, location, campaign ID, search engine ID, tags, keywords and custom views group), it doesn't contain campaign data.
  • Navigate to Reports&Tools > Custom Suites > Custom Views > Manager
  • Select All, a specific group or individual custom views
  • Click the Export button and save the file to your computer

Export custom view settings


How to Bulk Delete Custom Views


Utilizing the Bulk Delete option will remove all custom view settings for the selected items.
  • Navigate to Reports&Tools > Custom Suite > Custom Views > Manager
  • Select All, a specific group or individual custom views
  • Click the Delete button

bulk delete custom views

Confirm Deletion
Because bulk deletion is permanent (it is not possible to recover the settings), we recommend that you export your custom views prior to deleting them.
If you are certain that you are ready to delete the selected custom views, then click the Delete button. 

bulk delete warning

Successful Deletion of Custom Views

successful deletion


Create Custom Views Insight Graph


Three categories of metrics are available in the Insight Graph:
  • Campaign Metric: this allows data only from the campaign it is being created in
  • Cross Campaign Metric (Enterprise only feature): this allows data from any account campaign
  • Custom View Metric: this allows data from multiple campaigns to be aggregated (learn more...)             
Insight Graph metric types


Add Custom View Metric
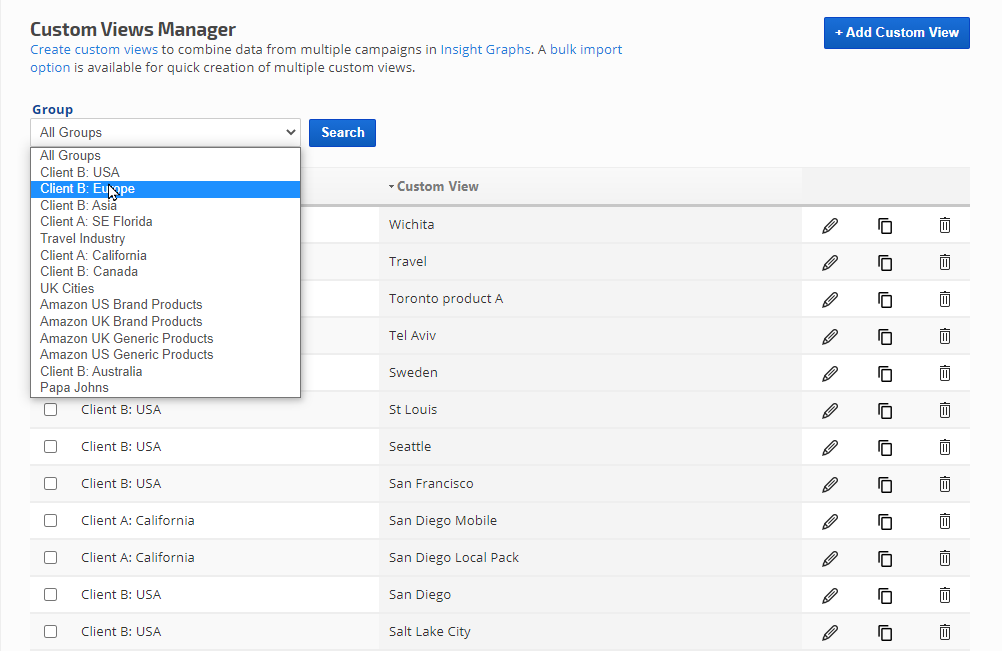
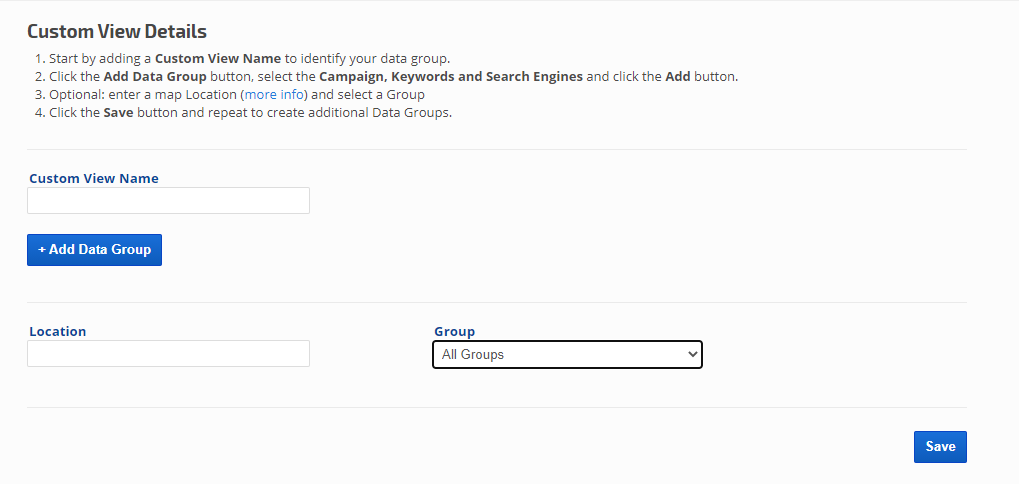
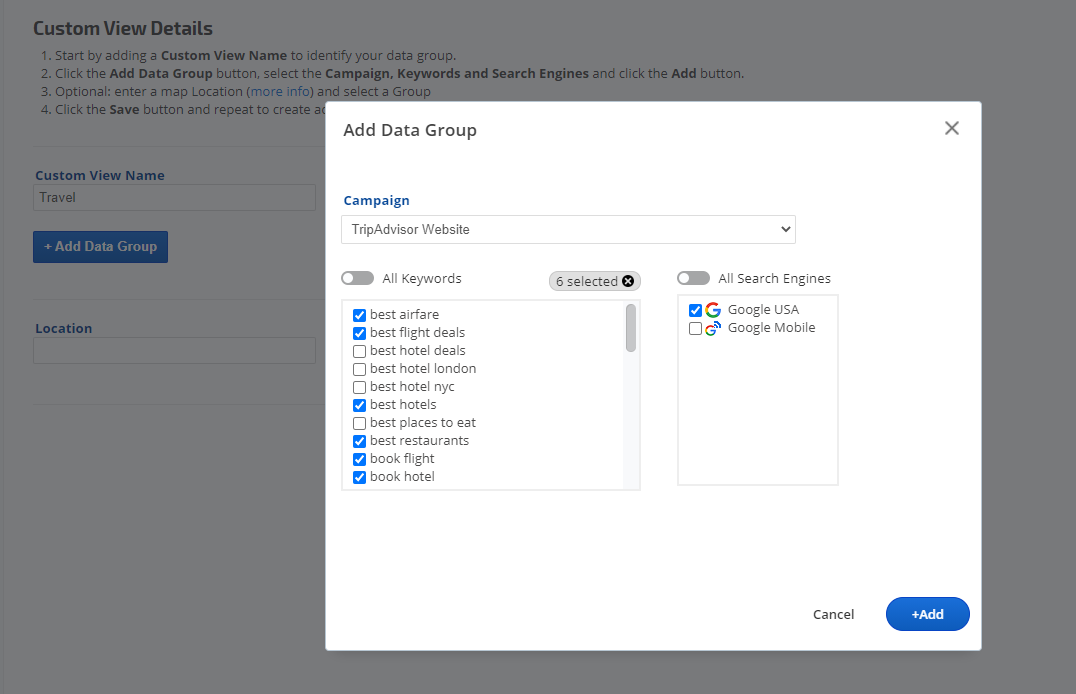
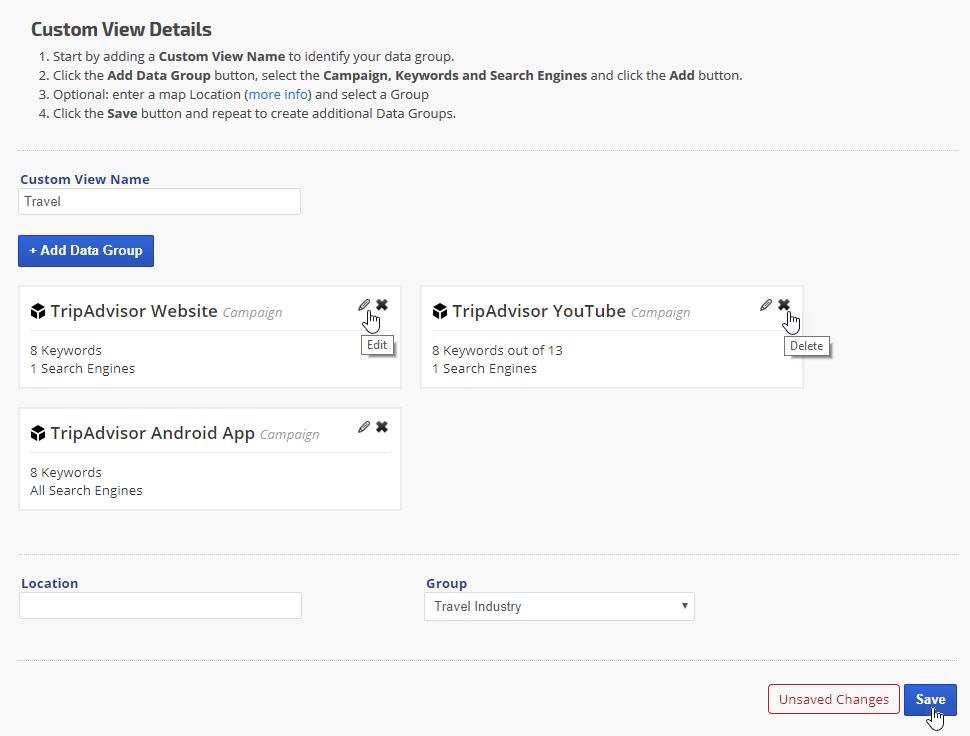
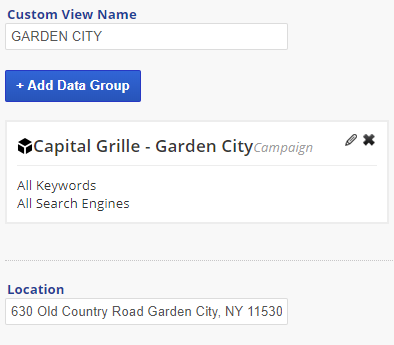
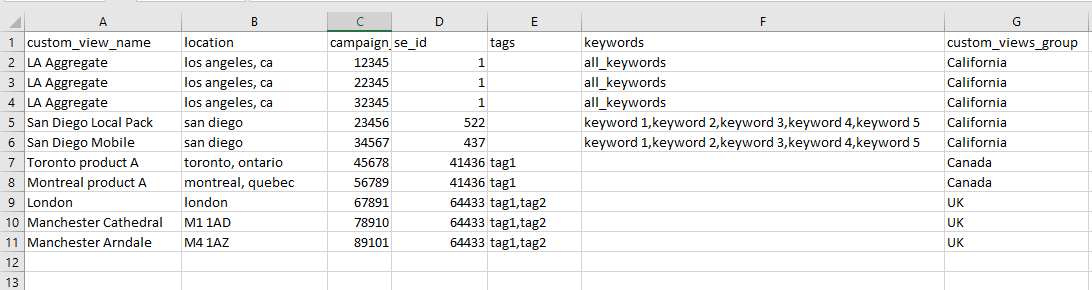
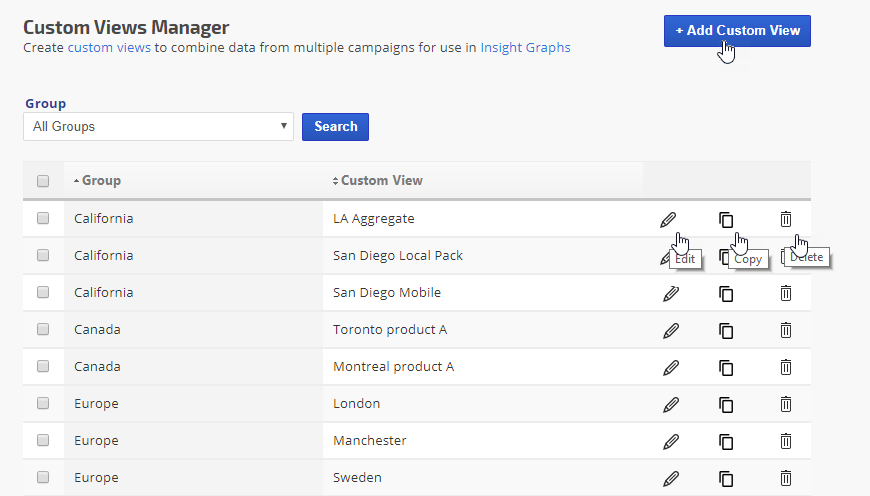
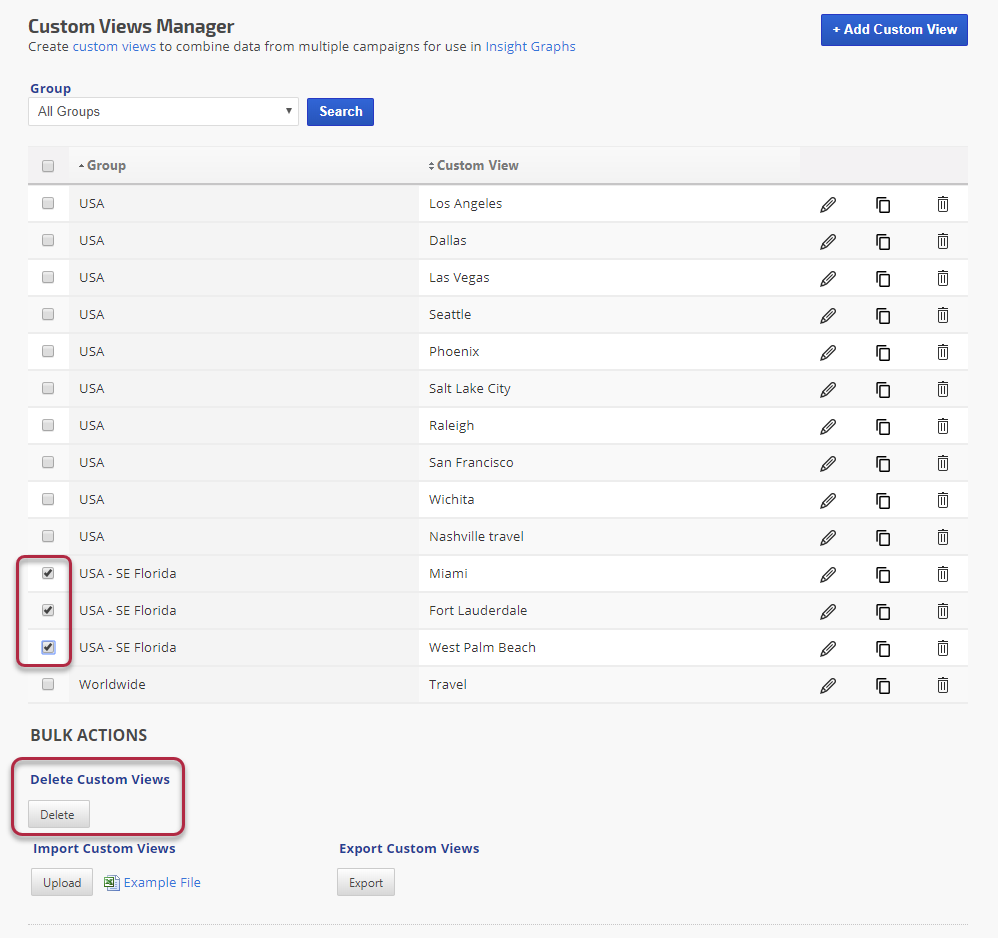
After creating custom views with data groups in Tools > Custom Views, you can click the Custom View button in the Insight Graph and select from the list of views that have been created in your account.
  • Select a Custom View and click the Add button

add custom view to insight graph


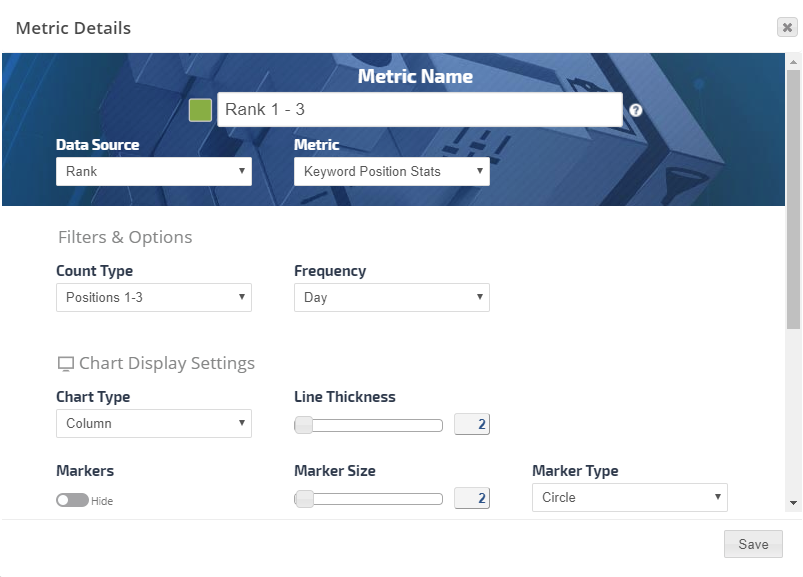
Add a Metric, you can choose from Rank:
  • Keyword Position Stats
  • Visibility Score            
add metrics

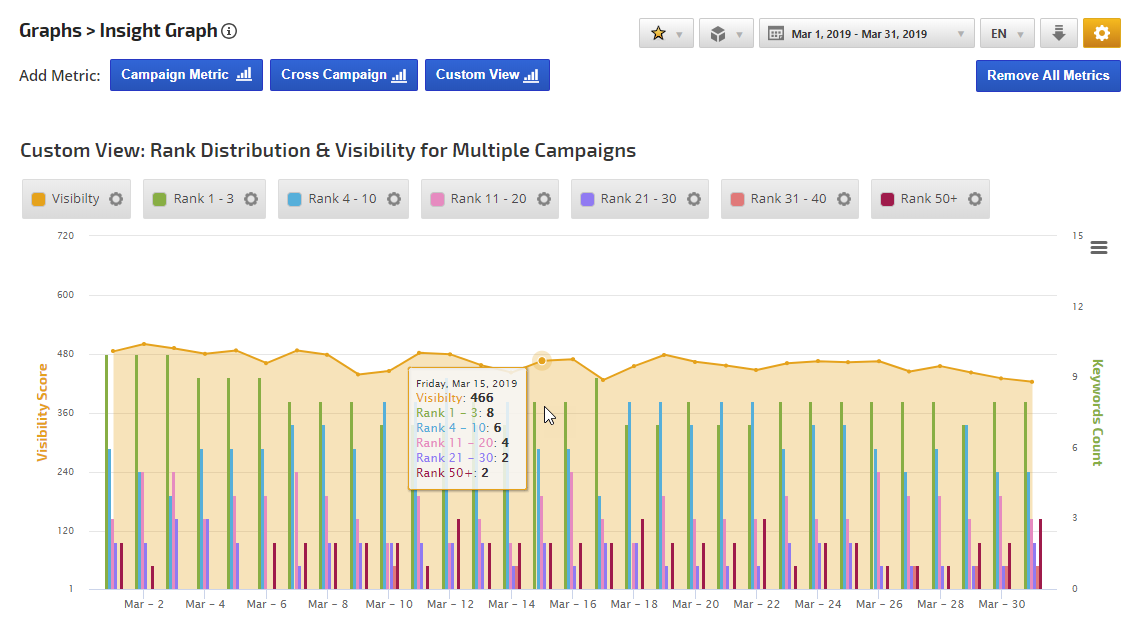
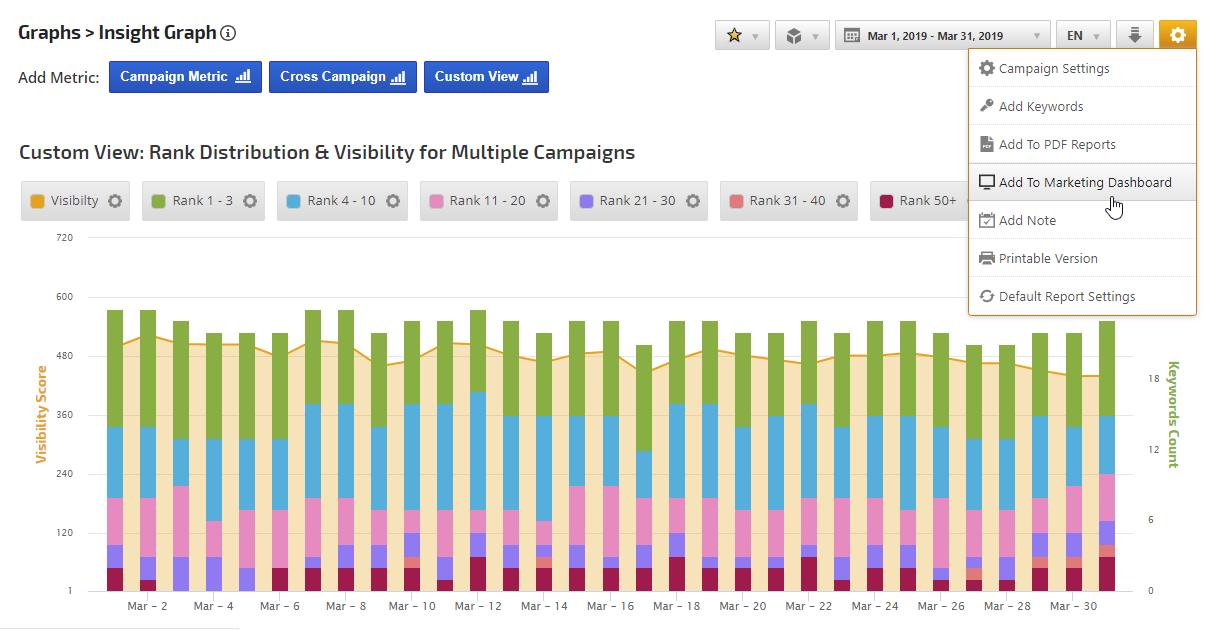
Insight Graph Example: Rank Distribution & Visibility for Multiple Campaigns
This graph was created by adding the following Custom View metrics:
  • Visibility Score with Area chart type
  • 6 Rank Position Stats metrics for different rank positions with Column chart type           
custom view insight graph

Change to Stacked Columns View
After adding all the metrics, if you've adding Column chart type you can change the Graph Settings to display as Stacked Columns and click the Apply Changes button.

stacked columns


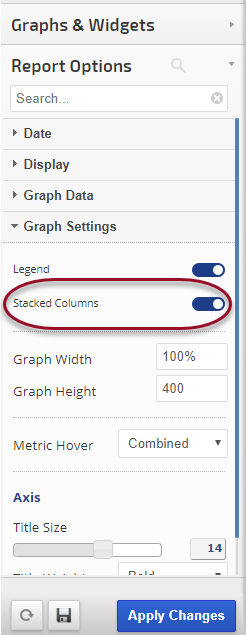
Insight Graph Example: Customs Views with Stacked Columns
Results after building a column graph and enabling Stacked Columns in Report Options > Graph Settings

To add this graph to a Marketing Dashboard or PDF Report, hover over the gear icon in the upper right and select the option and follow the on-screen instructions.
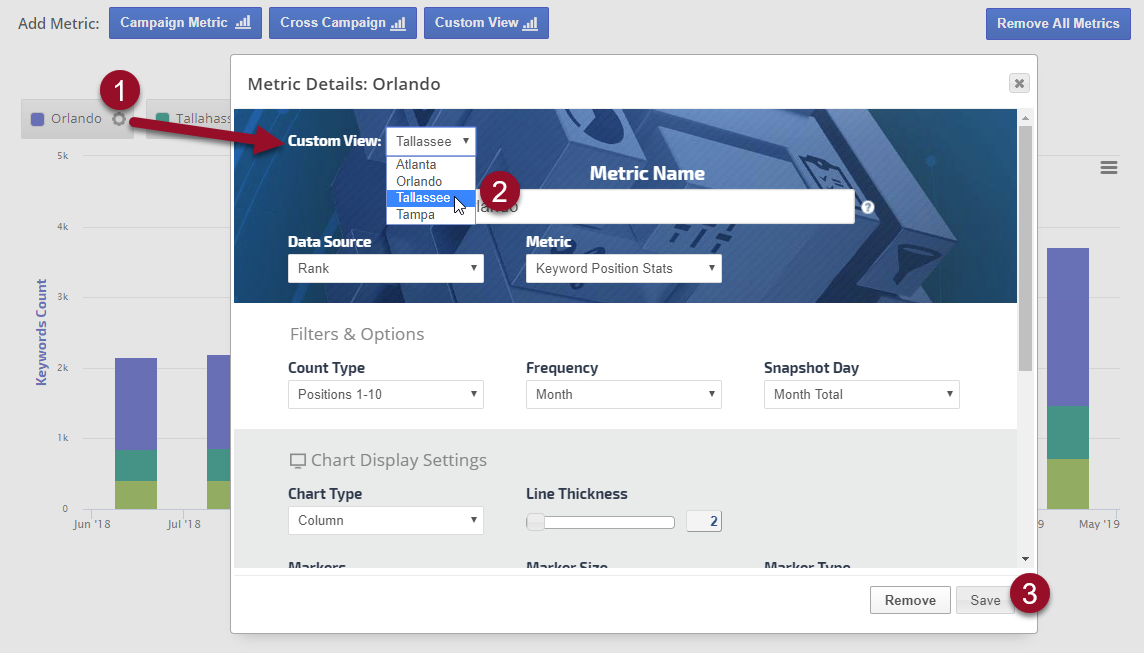
           
Custom View Stacked Columns


Edit Custom View
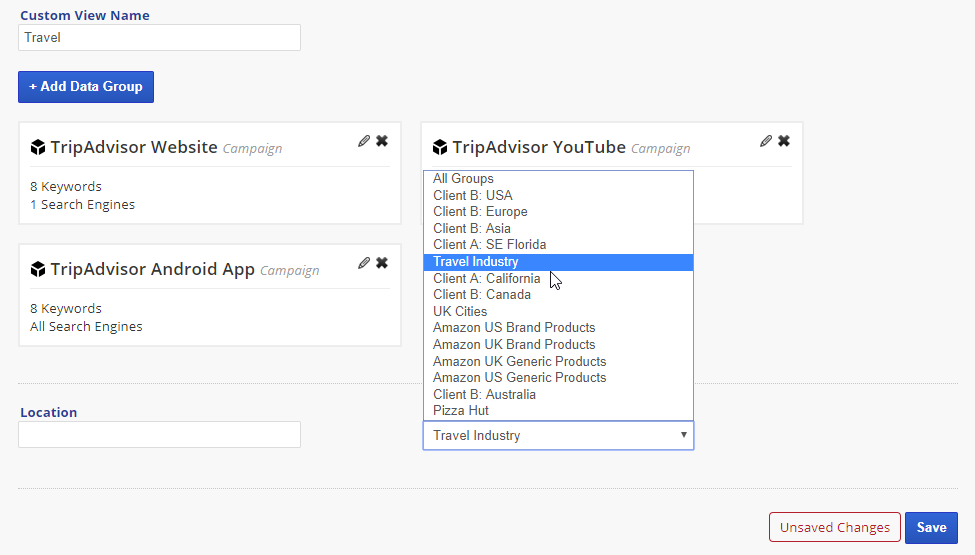
After saving a custom view metric, you can change the view:
1. Click the metric's gear / settings icon
2. Select a different Custom View
3. Click the Save button 

change custom view


Get the ultimate SEO tools with the Rank Ranger Software
Learn More About Rank Ranger